World-building: How I draw fantasy maps
/
I like maps. I think they’re great when you’re trying to figure out where your story is set and what the characters see in the world around them.
Now, I don’t consider myself an artist. My maps are messy, but I have learned a lot overtime about how to draw them.
I thought it would be fun and helpful to share some of the tricks and tips I’ve discovered about fantasy mapmaking and worldbuilding.
So, if you’re not an artist like me and you’re keen to create your own fantasy map in a way that doesn’t require you to be an artist, stay here and follow this post.
Disclaimer: I’m really, really sorry about the photos. I was drawing on an overcast day and the lighting wasn’t the best in my room. I edited them the best I could without affecting the drawings in them.
Also, at some point I moved from the floor to sit on my bed, so the lighting changes midway through the photos. So I’m sorry if the quality isn’t the best it could be. I hope you still find this post helpful to your storytelling anyway.
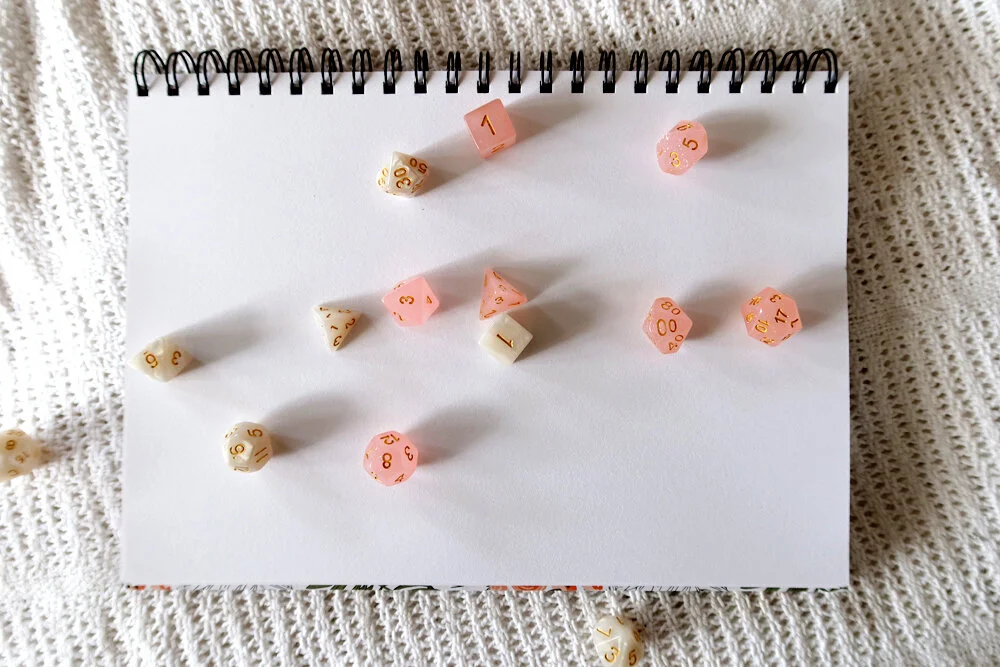
what you will need:
2 sets of dice (I am using dice sets for Dungeons & Dragons that my friend bought)
A sheet of paper
A pencil and 2 erasers (1 big, 1 small)
A handful of paper clips or something similar
A necklace chain (weird, I know, but I’ll explain)
A comfortable place to work because this will take a while
Step 1:
Take 2 sets of dice and toss them onto the blank paper. The idea is to create a land mass that looks as realistic and as original as possible. It would be incredibly lucky to get a good layout like this on the first try. This picture shows my 5th attempt at throwing the dice…I think.
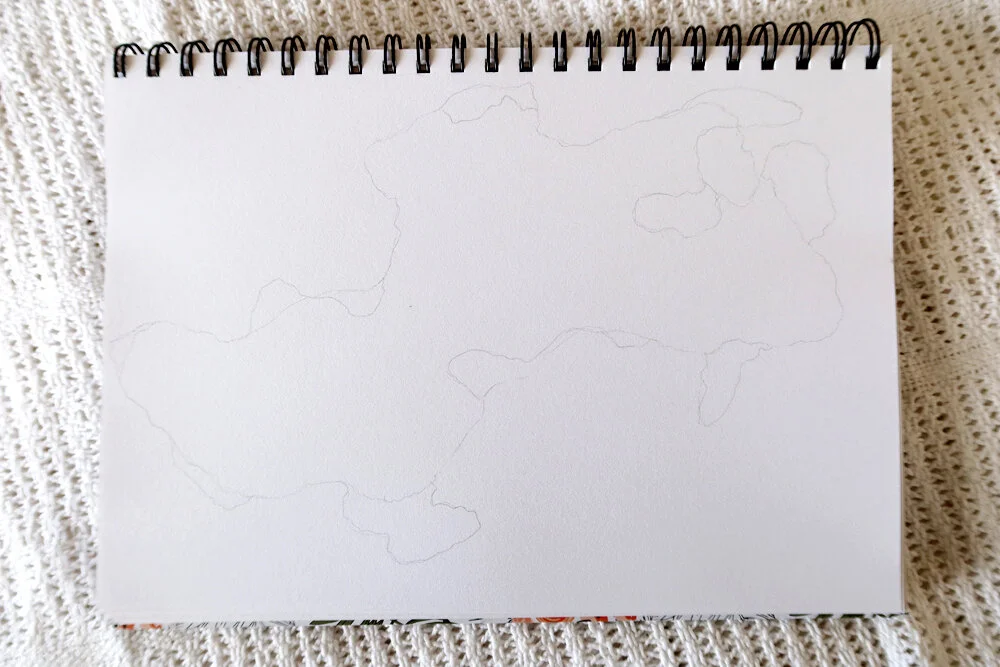
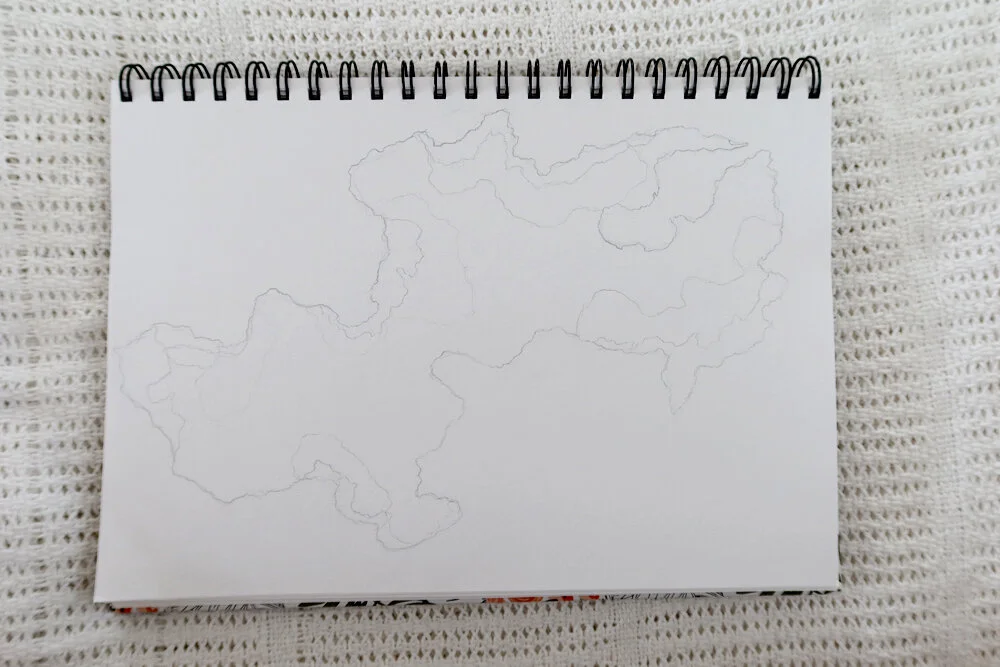
When you are happy with the spontaneous arrangement of the dice, carefully trace around the dice, connecting the lines into one major landmass or continent.

Step 2:
Because the initial map is too smooth, you want to make it look more naturalistic. In this step, take a handful of paper clips and throw them onto the sheet of paper until you are satisfied.
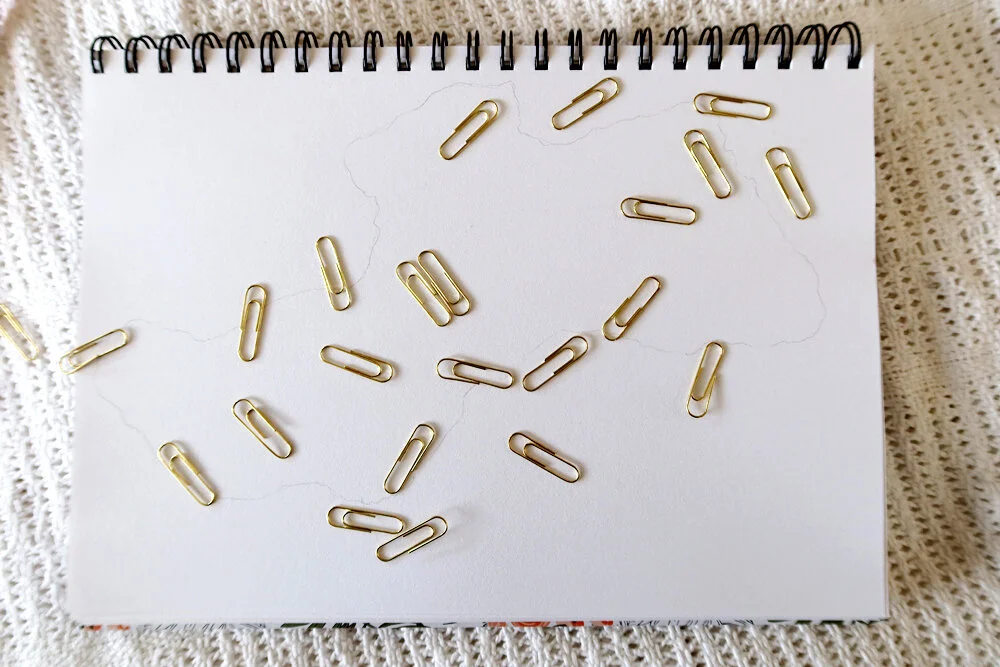
Then, draw around the paper clips. This gives the map more curves and shape. Such as coastal regions and peninsulas, etc. I’ve found this paper clip method is also good for creating small islands around the main land masses.
Step 3:
Then, take the necklace chain and arrange it along the pencil line and trace along the chain. Repeat the pattern around the edge of the entire map.
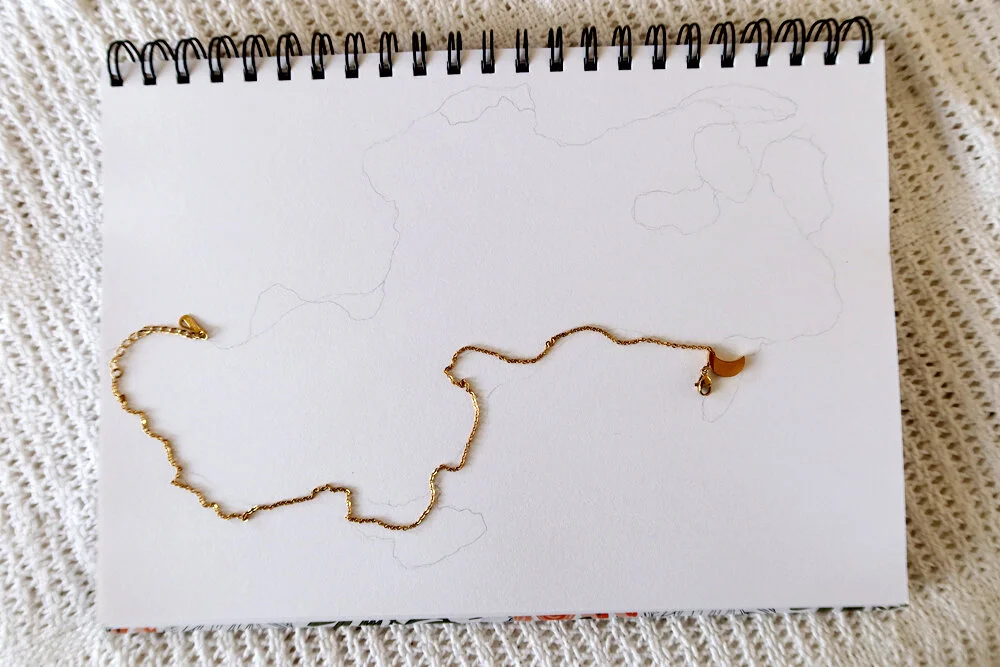
I’ve found that this helps give the map a rougher edge and makes it look more naturalistic. Especially if you’re not very good at drawing.

Then, you can go ahead and erase all the lines.

Step 4:
This step is about choosing where natural landmarks will be, such as mountains. Be mindful of where you place the mountain ranges because if you put too many directly in the middle it would mean travel by land is hindered by these mountain ranges and rely on mountain trails to travel.
Instead of throwing the dice this time, arrange them in clusters and lines where you want your mountain ranges to be located within your world.

When you’ve arranged your dice to create mountain ranges, trace carefully around them to create guidelines. Then, hand-draw or use the necklace chain again to create squiggly lines along these guidelines.
There is no right or wrong way to draw mountains. I’ve just made little clusters of small, medium and large triangle shapes. I’m not an artist and it is NOT perfect but it gives me an idea of what these mountain ranges look like.

Step 5:
This step is about choosing where the sources of water will be, such as rivers and lakes. Because rivers tend to stream downwards from mountains, it is most common to place rivers near mountains. Similarly, rivers can also flow into lakes, which are basins of lower land that collect rainwater and such.
For this step, throw the dice and/or paper clips to choose where major water sources are on your map. To connect rivers better to mountain ranges, you can also arrange the paper clips by hand.

After this, trace lightly around the paper clips to create areas where lakes will sit and rivers will stream from mountain peaks to the ocean.
Again, you can use the necklace chain to create a squiggly line to show a naturalistic river.
Draw where the rivers stream from mountains towards the sea, or to dead, dry areas, or into lakes. Most people tend to show bodies of water on their maps with two lines as seen in the photo to differentiate these lines from other things like roads or boundary lines or forests.
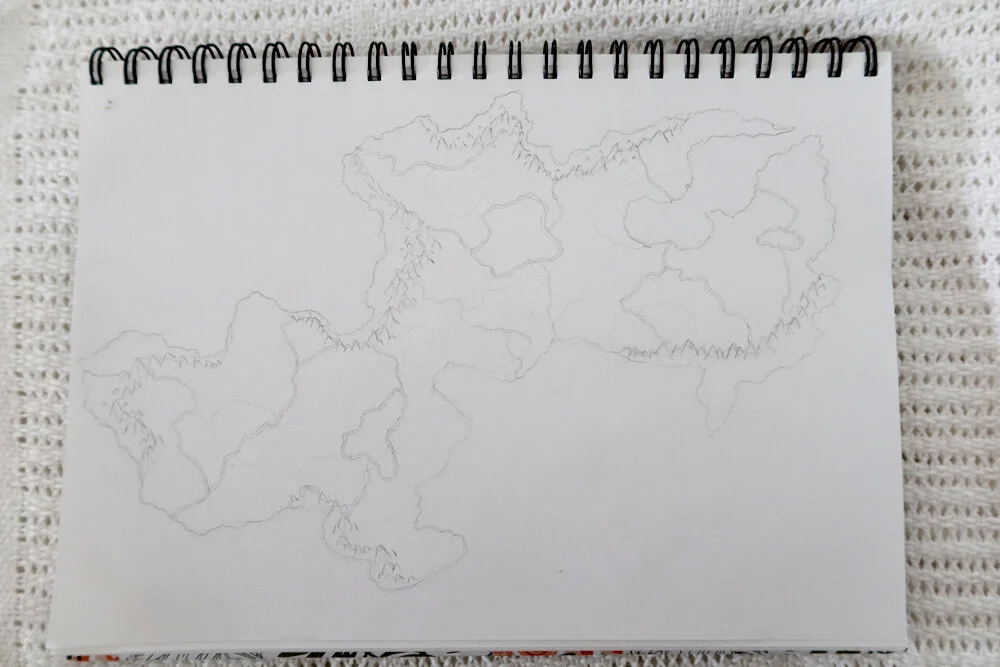
Step 6:
This step is about choosing where the forests and major areas of natural vegetation will be placed. It’s common for forests to be located near mountains and bodies of water.
For this step, place the sets of dice onto the paper by hand and choose the areas that will become forests. Again, loosely draw circles and shapes around these areas to give them form.

Like bodies of water and mountains, there are several ways to draw forests on fantasy maps. I am not an artist, so I chose to simply represent it with little blobs with specks on them. It ended up looking like bacteria (lol) but I know it’s a forest, so that’s what matters most.

This is what my fantasy map looks like when it is finished. Obviously, I’m not an artist so it isn’t perfect but it does give me a good idea of what the world looks like from above, where the natural landmarks and barriers are, and where the natural resources are (vegetation and water). Later, I will fill in the blank spaces with settlements, cities, kingdoms on a small scale. So, I hope you enjoyed reading this post and following these steps.
Don’t forget to share this post to social media and leave a ‘like’!
follow me elsewhere for more cozy, creative content and updates